CryoDRGN
CryoDRGN (Zhong et al., 2021) is a tool for detecting conformational heterogeneity in cryo-EM datasets. It can perform heterogeneous reconstructions based on a continous distribution of density maps, helping you distinguish different structural states of your cryo-EM sample.
CryoDRGN is a post-processing tool, so you will need particle images that have already been refined and led to a good initial 3D reconstruction. If you need guidance on how to perform this initial refinement in CryoCloud, please refer to our Tutorial for a short introduction.
CryoDRGN on CryoCloud is divided into two jobs: a pre-processing step which produces the necessary files automatically, and the main CryoDRGN job itself. If you have produced the required files yourself externally, you can also upload them via the archive button and skip the preprocessing step.
Pre-processing job
You can find the pre-processing job for CryoDRGN in the post-processing column of your project. Click the + button, select CryoDRGN Pre. and choose the input job you would like to use.
On the job setup page, you can leave most parameters empty. The input particles should be set to the star files containing the particles you want to analyze.
If you want to downsample your particle size, change the Downsampled particle size to the desired box size and set the Downsample mode to DOWNSAMPLE. You can also speed up calculations by only using a subset of your particles to speed up the calculations by setting Number of particles to use to a value lower than your total number of particles.
The set up should look something like this:
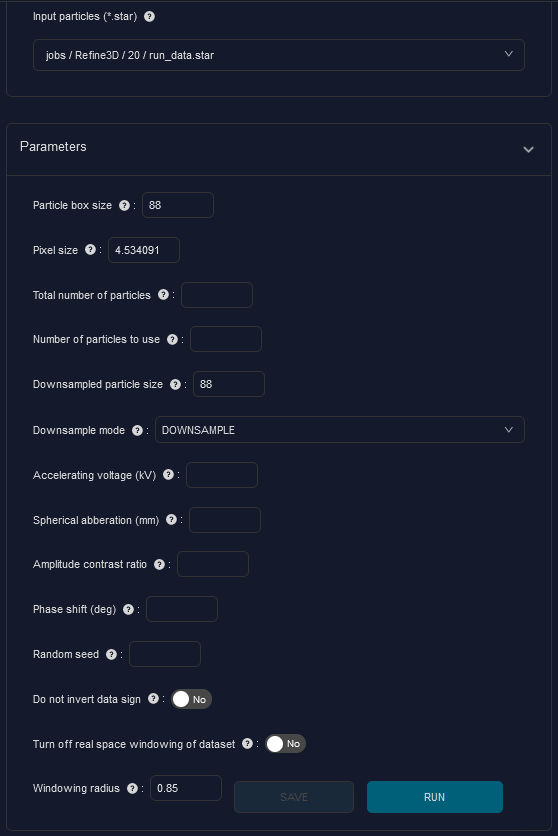
Once you have set all your parameters, click Save and Run at the bottom of the page.
Main CryoDRGN job
To set up the main CryoDRGN job, click again on the + in the post-processing column and this time select CryoDRGN, using your CryoDRGN pre-processing job as the parent job.
The output files from the CryoDRGN pre-processing job can now be used to fill in the input fields as follows (replace N with the job number of the pre-processing job):
Particle stack file:jobs/CryoDRGN_Preprocessing/N/downsampled_particles.txtPose file:jobs/CryoDRGN_Preprocessing/N/pose.pklCTF file:jobs/CryoDRGN_Preprocessing/N/ctf.pkl
The parameters section can be left mostly unchanged. If you have downsampled your box size in the pre-processing job, remember to set the Downsample mode to DOWNSAMPLE.
Using the output from the preprocessing job, this will look something like this:
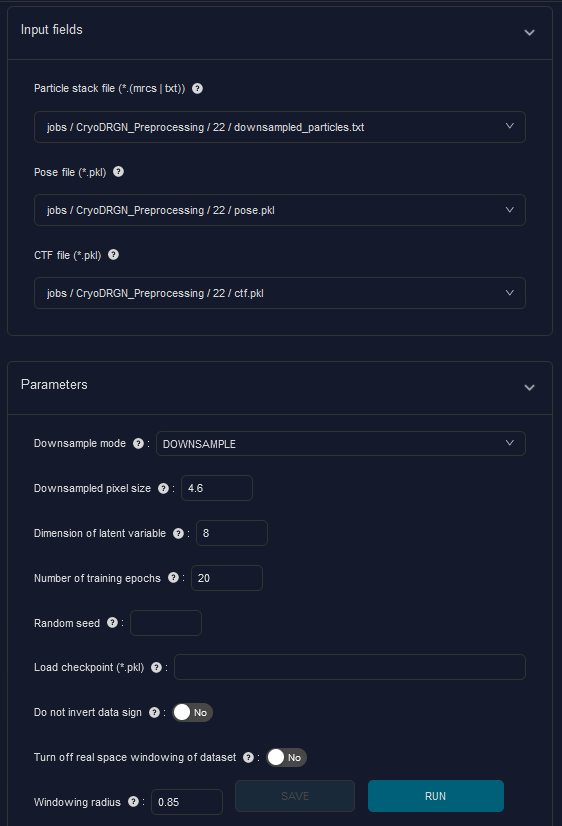
You can leave the Tilt series section empty if you are working with single particle data.
The Training parameters section contains various parameters that can be adjusted to change the CryoDRGN training. Most of the time, you can leave these as the default valuesis and they should yield good results.
Output
Once the job has finished, you can go to the Results tab and download the files you need. The most interesting ones are likely the umap PNG graphs and the corresponding MRC volumes, which can be opened in a viewer such as ChimeraX. Both outputs can help you assess how CryoDRGN sorted the particles and where the volumes improved compared to the initial reconstruction.