Datasets
The Datasets page provides an overview of all datasets available to your team, including active datasets (see below), incomplete datasets and archived datasets. From here, you can view dataset details, manage storage, filter and sort the table, and open individual datasets for inspection.
To learn how to upload data, see Upload a dataset
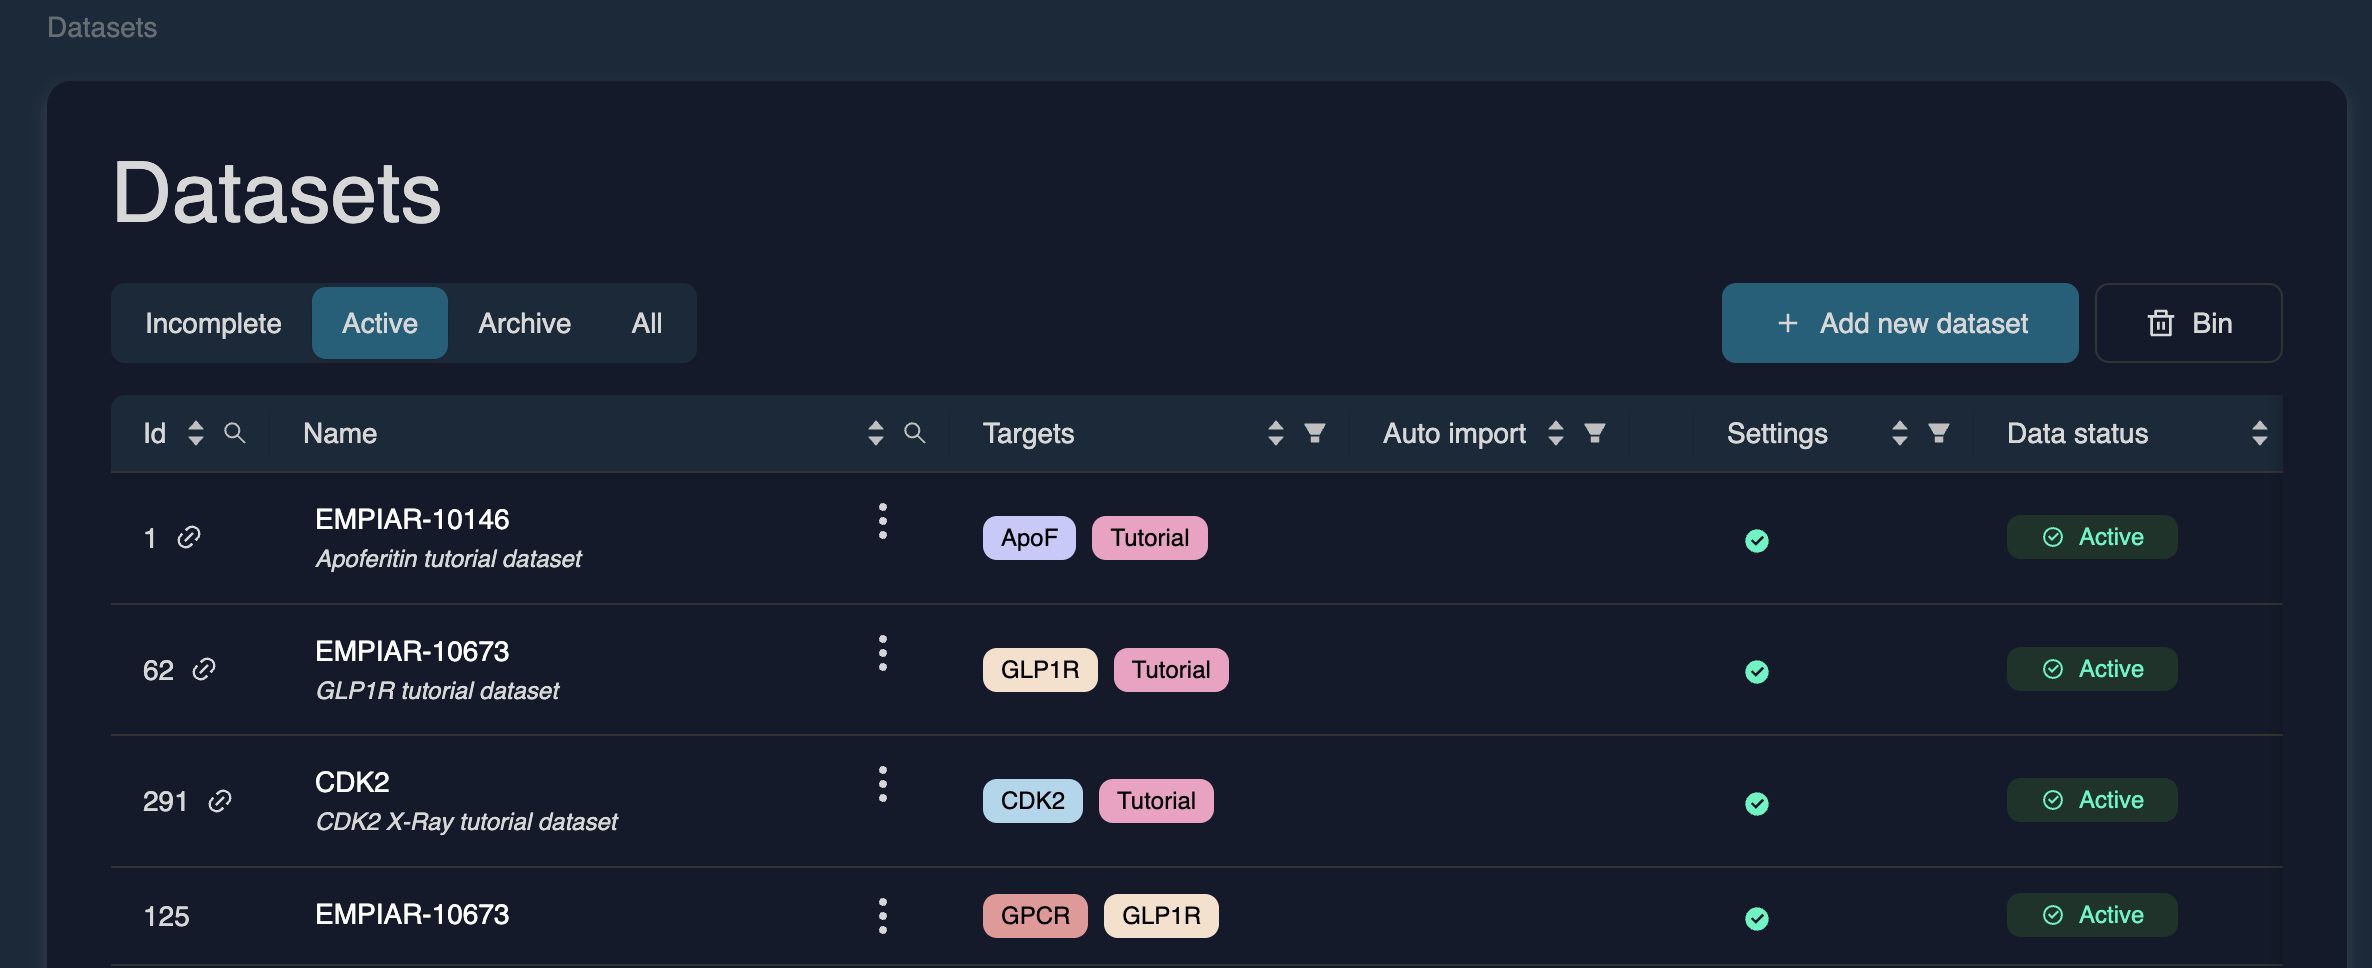
Dataset categories
•   Incomplete – Datasets missing uploaded data or acquisition parameters.

•   Active – Fully available datasets stored in your team’s S3 bucket; these incur storage costs.

•   Archive – Datasets moved to low-cost archive storage; unavailable for compute jobs or download until retrieved.

•   All – Shows every dataset visible to your team.
Linked datasets (no storage cost)
A link icon next to a dataset ID indicates that the dataset is stored in another team and simply linked to your user. Linked datasets do not accrue storage costs. Tutorial datasets are automatically linked to new accounts.
Navigating and filtering the dataset table
You can filter or sort datasets by several parameters, such as ID number, name, target labels, auto-import status, settings, data status, dataset type, and creator. Use the magnifying glass in the header to search, or click the filter icon to apply filters to specific columns.
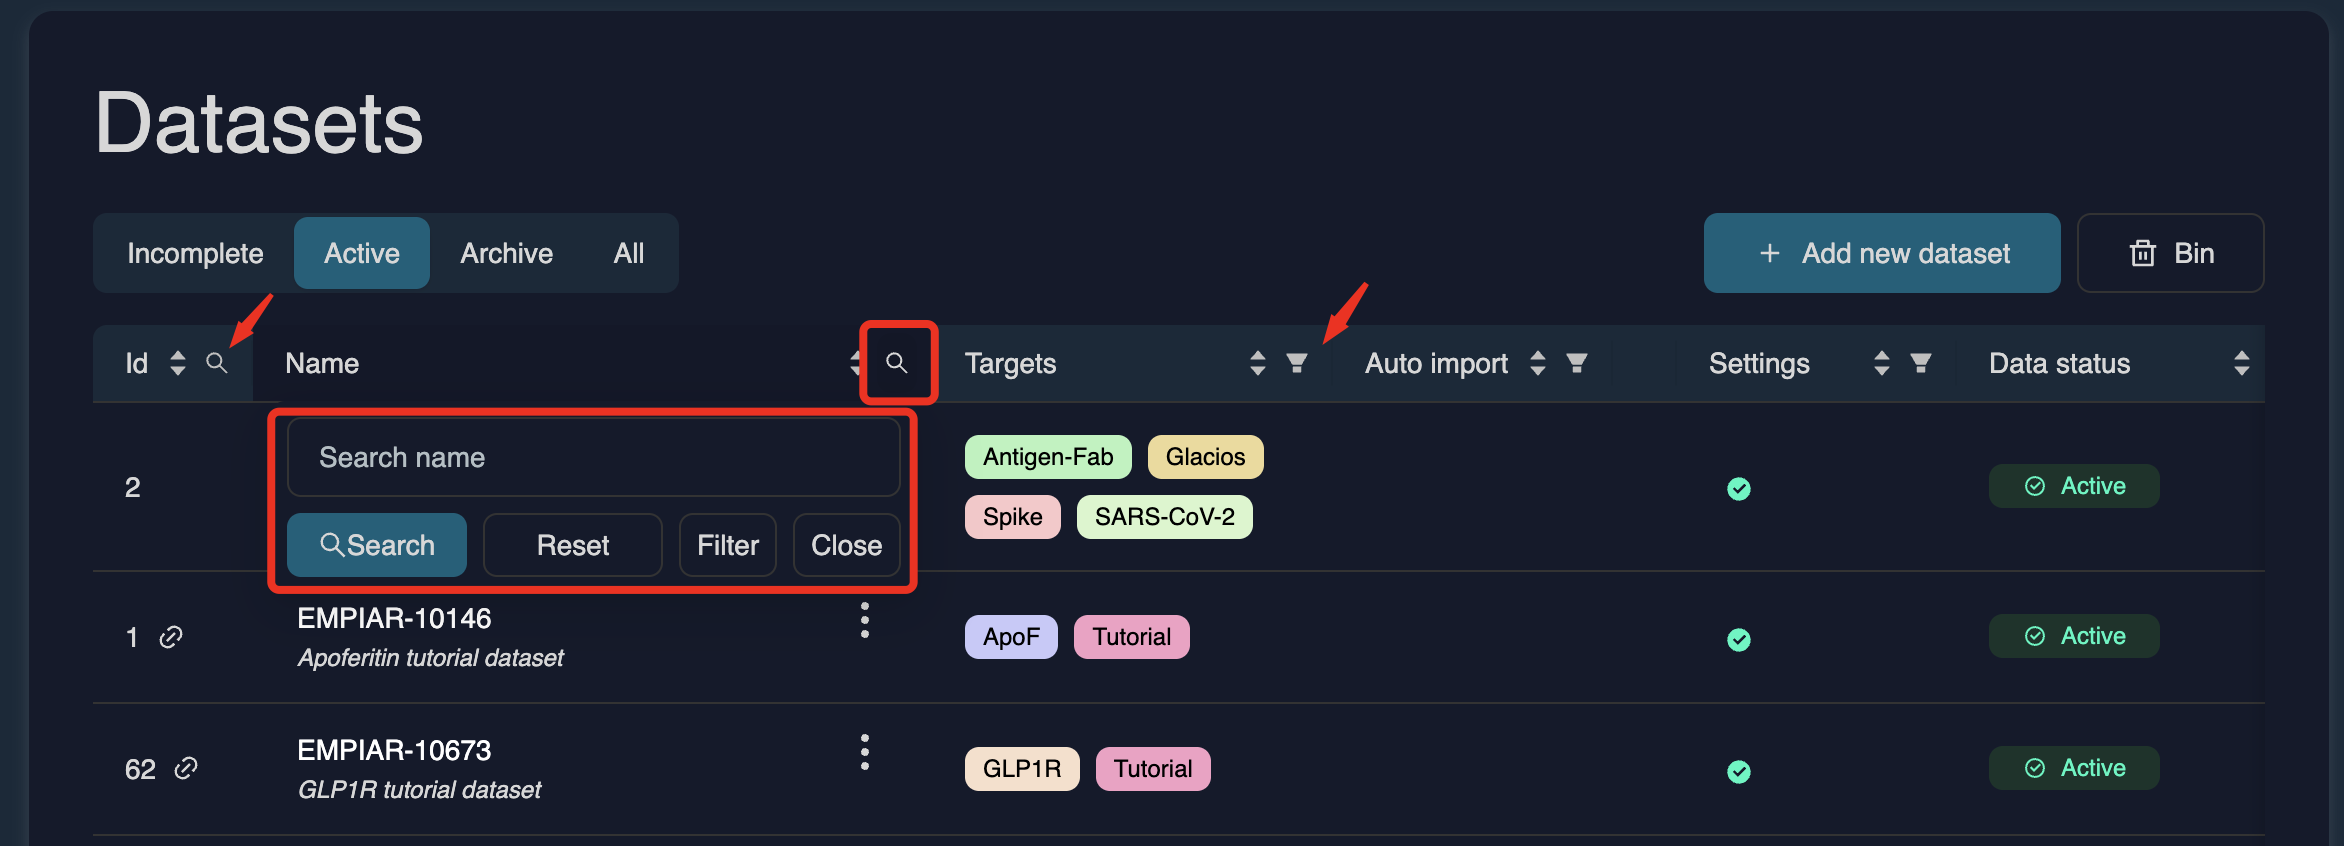
More dataset details (such as data type, storage usage, file count, associated projects, creator, and creation date) can be viewed by scrolling to the right of the table.
You can also click any column header (e.g., Storage) to sort in ascending or descending order.
Archiving a dataset
To archive a dataset, click the three dots next to the dataset and select Archive.

Review the confirmation window, which explains:
• Minimum archive duration (6 months) • Retrieval conditions (up to 48 hours, extra cost) • Expected archiving cost • Estimated savings compared to active storage
Click Confirm to schedule archiving.

Once archived, the dataset appears in the Archive tab
Retrieving a dataset from the archive
Navigate to the Archive tab in the Datasets table, click the three dots next to the dataset and select Retrieve from archive. Choose the number of days you need the dataset available. You will see a retrieval summary explaining:
• Retrieval allows temporary access for compute jobs or download
• A temporary copy is created for the chosen duration
• You pay for both archived and retrieved copies during that time
• Retrieval can take up to 48 hours
Click Confirm to proceed.

Opening and editing a dataset
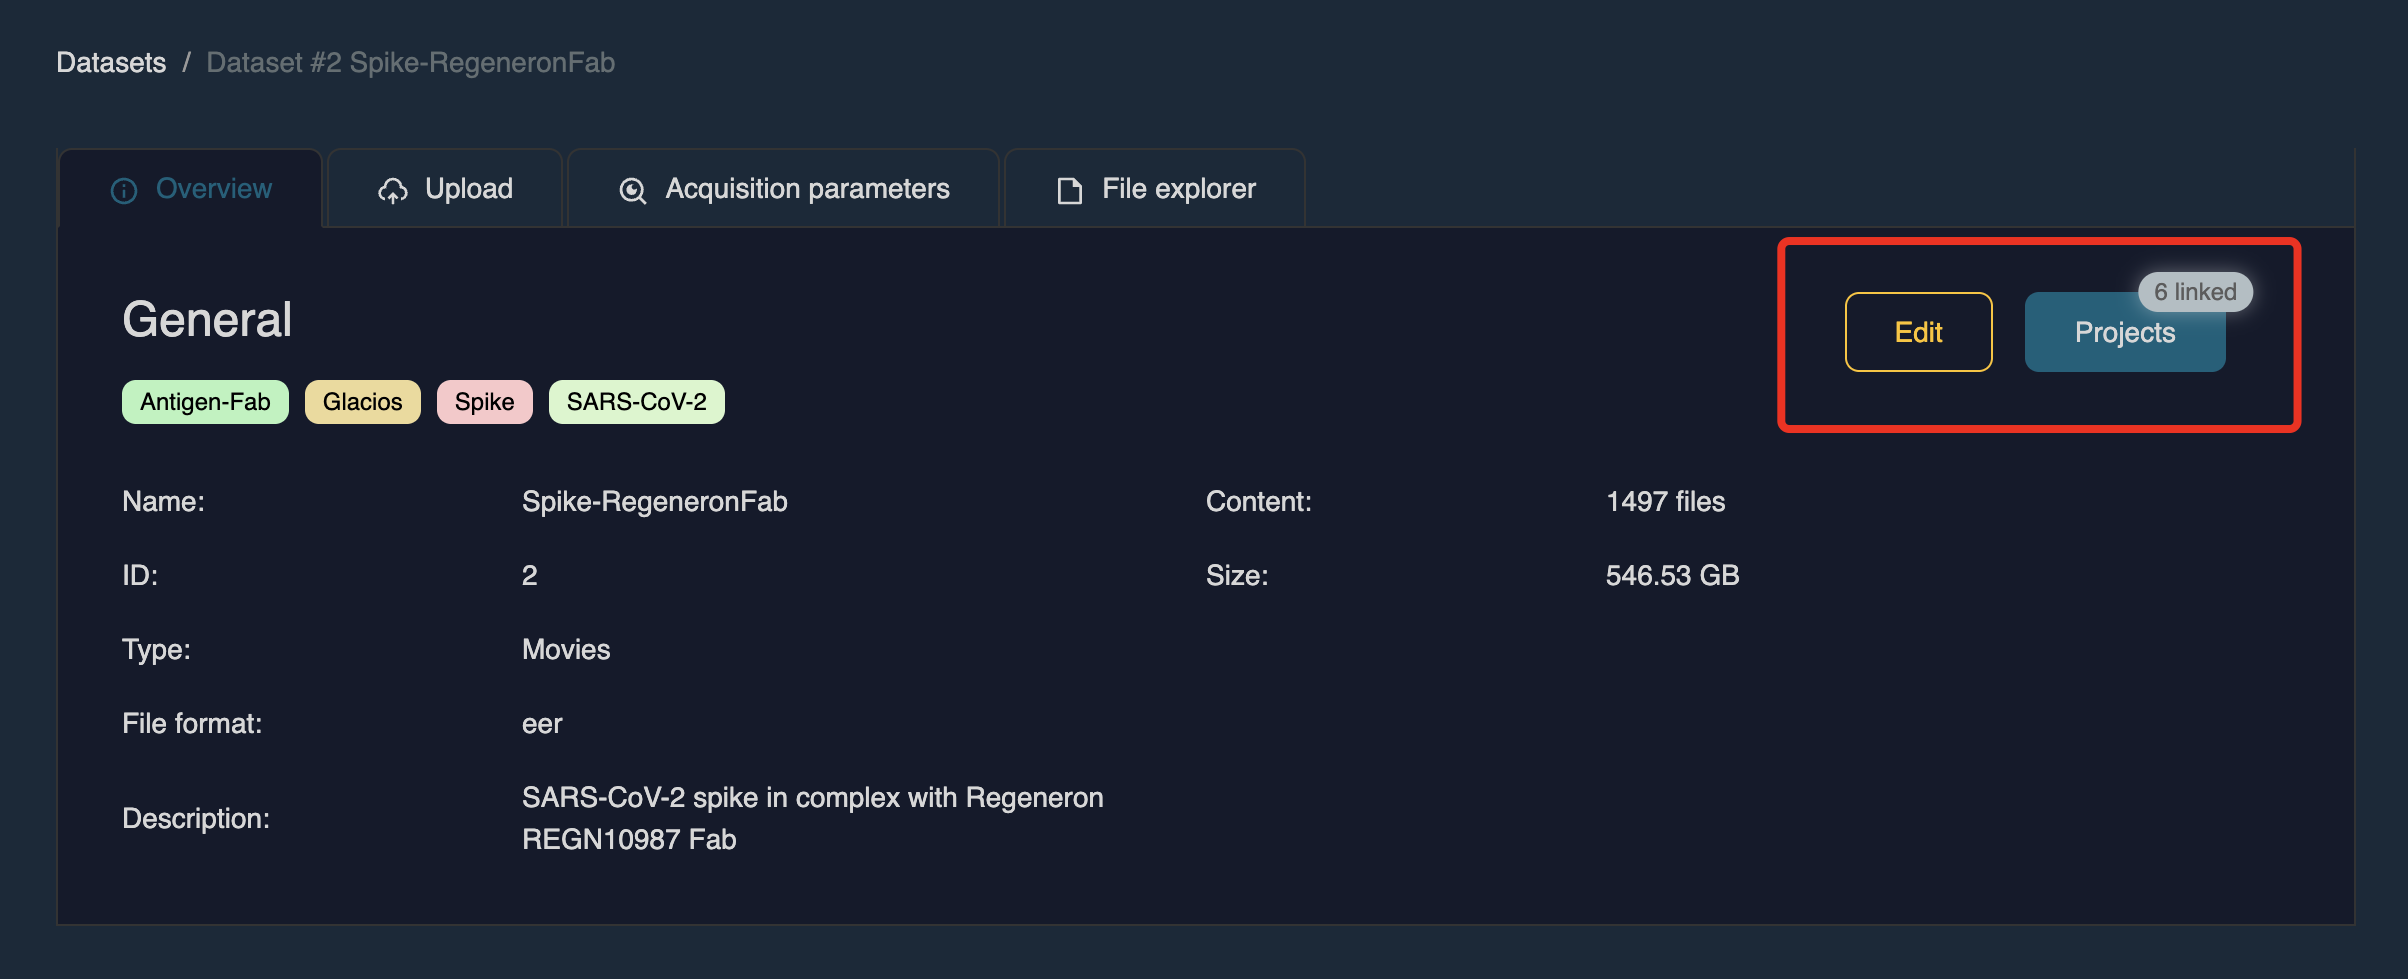
Click the dataset name in the table to open it. Each dataset contains four tabs:
• Overview – Displays dataset metadata such as name, description, data type, and labels. Click Edit in the top-right corner to update these fields. You can also view which projects the dataset is linked to by clicking Projects.
• Upload– Generate upload credentials and access dataset-specific upload instructions.
• Acquisition parameters – Enter or update microscope, detector, and other acquisition settings.
• File explorer – Browse the dataset’s folder structure and uploaded files.
For detailed instructions on data upload and acquisition parameter entry, see Upload a dataset
Storage costs and cost savings
Storage costs vary by subscription tier. For full details, refer to the Billing page. In general, archived datasets are around 12× more cost-efficient than active storage. Since cryo-EM datasets can be very large (often several terabytes), storage is typically one of the major ongoing cost drivers.
Recommended best practice:
Once motion correction is complete (and raw movies are no longer required), archiving the dataset immediately is highly recommended. This significantly reduces storage costs while still allowing retrieval later if needed.